Aseptic Technique in Environmental Science
Przegląd
Source: Laboratories of Dr. Ian Pepper and Dr. Charles Gerba - The University of Arizona
Demonstrating Author: Luisa Ikner
Aseptic technique is a fundamental skill widely practiced in the field of environmental microbiology that requires a balance of mindfulness and practice in the laboratory. Proper use of this technique reduces the likelihood of bacterial or fungal contamination of reagents, culture media, and environmental samples. Aseptic technique is also vital to ensure data integrity and maintain the purity of culture libraries that may be comprised of very rare and difficult to culture isolates. Sources of contamination in the laboratory environment include airborne microorganisms (including those adhering to dust and lint particles), microbes present on the laboratory bench workspace or on unsterilized glassware or equipment, and microbes transferred from the body and hair of the researcher. The use of aseptic technique is also a safety measure that lowers the potential for the transmission of microorganisms to researchers, which is particularly important when working with pathogens.
Zasady
The goal of using aseptic techniques is to create and maintain a sterile working environment, equipment, and reagents, so as to minimize contamination of biological samples. To do this, the work space and some tools can be disinfected with chemicals such as 70% ethanol and dilute bleach. It is also important for the researcher to don personal protective equipment (PPE) such as a lab coat, gloves, and safety goggles.
Media and reagents can be sterilized using filter sterilization apparatuses employing 0.22-µm filters, which effectively remove most microorganisms such as bacteria. Alternatively, many reagents and equipment can also be sterilized in high heat. For example, microbes on or in tools, glassware, and liquid media can be heat-killed in an autoclave, which is a chamber that sterilizes contents via exposure to high-temperature pressurized steam. In addition, some tools can be heat-sterilized using a flame source, such as a Bunsen burner.
The use of a flame source is also one of the most common ways to establish an aseptic working environment. The heat from the flame causes air convection, generating an updraft that lifts any airborne contaminants away from the vicinity of the burner, and creating a “sterile field” in which to conduct aseptic experimental work.
Procedura
1. Preparation for Aseptic Work
- Obtain and apply the following PPE items: lab coat, latex or nitrile gloves (free from tears or holes), and safety goggles (Figure 1). For safety in the event of using an open flame, tie back long hair.

Figure 1: PPE: A lab coat, latex gloves, and safety goggles. - A second important aspect of aseptic technique is the proper sterilization and storage of media/reagents to be used in the laboratory. Prepare liquid broth medium (e.g., tryptic soy broth) and agar-based media (e.g., R2A) by weighing the proper amount of dried base powder, which is added to the appropriate amount of de-ionized water.
- For the broth medium, dissolve the powder on a hot plate with low heat applied, and dispense the liquid either in 100-mL volumes into glass screw-top flasks, or in 10-mL volumes into glass screw-top test tubes. Using a magnetic stir bar, stir the agarose medium on the hot plate stirrer until the powder is fully dissolved.
- Apply autoclave tape to the containers, and autoclave the media according to the manufacturer’s instructions (e.g., 20 min at 121 °C) (Figures 2 and 3). Note that the color of stripes on the autoclave tape should change from white (pre-autoclave) to black (post-autoclave). Although the color change generally indicates that sterilization was successful, sterility checks using spore strip kits can be conducted to verify the autoclaving process.

Figure 2: Autoclave tape being applied to material.
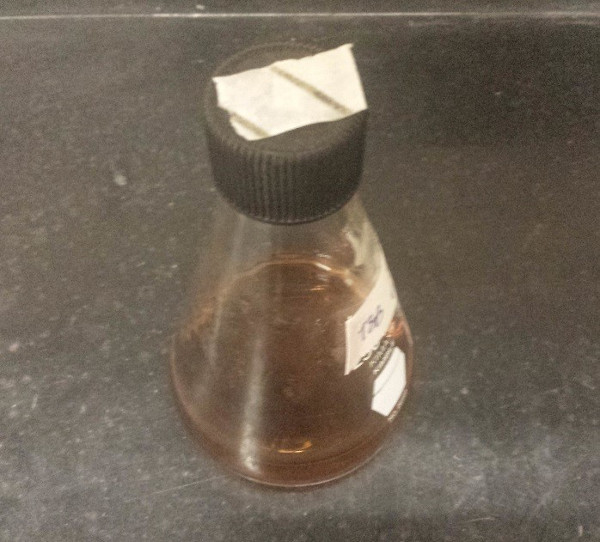
Figure 3: Note the color change of stripes on autoclave tape from white (pre-autoclave) to black (post-autoclave). - Cool the liquid broths to room temperature, and then store at room temperature or refrigerated at 4 °C.
- Cool the agarose medium by placing the container into a water bath set to ~50 °C. Once cooled, the media can be poured into sterile Petri dishes. Allow the medium to cool and solidify, then consolidate for storage under temperatures specified by the manufacturer.
- There are several varieties of culture media that cannot be autoclaved as the high temperatures degrade critical ingredients. Sterilizing these require filter-sterilization using a vacuum filtration system employing a 0.22-µm filter, followed by storage at the appropriate temperature.
- Prior to performing work on the benchtop, disinfect the surface using an appropriate solution (e.g., 500-ppm bleach). This lowers the risk of transferring contaminants from the working surface to cultures and sterile media.
- To establish a sterile field, turn on a Bunsen burner. The flame type best suited for sterilizing metal inoculating loops is an intense blue flame, with a definitive blue cone observed in the middle (Figure 4).
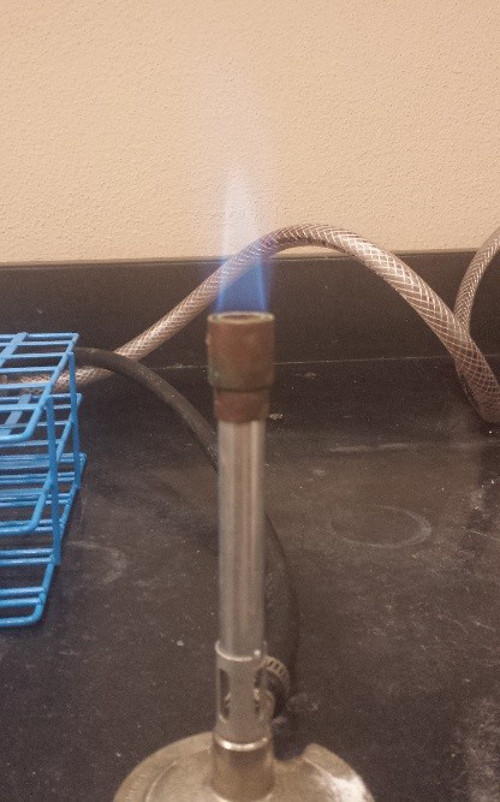
Figure 4: A transfer of bacteria from one Petri plate displaying growth of a cultured isolate to another un-inoculated Petri plate containing an agar-based growth medium. - Slowly pass the inoculating loop through the hottest part of the flame (tip of the blue cone). The loop should turn red hot for the purpose of sterilization.
2. Bacterial Transfers: From Petri Plate to Petri Plate
- One scenario of transferring bacteria is from one Petri plate displaying growth of a cultured isolate to another, sterile Petri plate containing an agar-based growth medium.
- To begin, slightly open the Petri plate containing the pure bacterial culture, and gently tap the hot, sterilized inoculating loop onto the agar surface.
- Retrieve one isolated colony from the surface of the plate using the cooled inoculating loop, and close the Petri plate.
- Perform a streak for isolation using a fresh Petri plate containing culture medium, with the lid slightly ajar.
- For each portion of the isolation streak (3 total per plate), flame-sterilize the inoculating loop just prior to use. Also, flame-sterilize the loop just after the final streak is performed in order to prevent contamination of the bench surface and as a consideration to others in the lab who may later use or come into contact with the inoculating loops.
- Place the streaked plates into an incubator for growth overnight.
3. Bacterial Transfers: From Broth Culture to Petri Plate
- A second scenario of transferring bacteria is from a broth culture exhibiting growth, as generally observed by turbidity, to a sterile Petri plate containing growth medium.
- Remove the cap from the test tube (or flask) containing the pure bacterial culture, and pass the opening of the container 2-3x through the hottest portion of the flame. To prevent contamination, do not set the cap down onto the benchtop.
- Carefully lower the sterilized inoculating loop into the tube/flask, and gently press against the side of the container to cool just prior to insertion into the broth culture.
- Remove one loopful of broth culture (Figure 5), and immediately replace the cap.
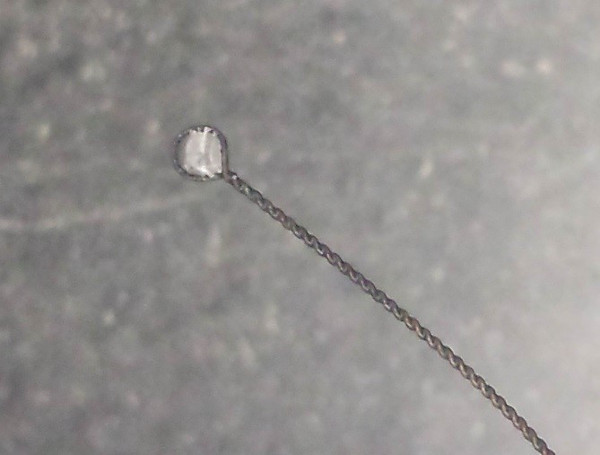
Figure 5: One loopful of broth culture. - Perform a streak for isolation using a fresh Petri plate containing culture medium, with the lid slightly ajar.
- For each portion of the streak (3 total per plate), flame-sterilize the inoculating loop just prior to use. Also, flame-sterilize the loop just after the final streak is performed in order to prevent contamination of the bench surface and as a consideration to others in the lab who may later use the inoculating loops.
- Place the streaked plates for isolation into an incubator for growth overnight.
4. Bacterial Transfers: From Petri Plate With Growth to Sterile Liquid Medium
- A third scenario of transferring bacteria is from a Petri plate containing an isolated culture streak to a tube/flask containing sterile liquid growth medium.
- Slightly open the Petri plate containing the pure bacterial culture, and cool the hot inoculating loop by tapping it gently onto the agar surface.
- Retrieve one isolated colony from the surface of the plate using the cooled inoculating loop, and close the Petri plate.
- Remove the cap from the test tube (or flask) containing the sterile liquid growth medium, and pass the opening of the container 2 to 3 times through the hottest portion of the flame. To prevent contamination, do not set the cap down onto the benchtop.
- Carefully lower the extracted colony into the liquid broth medium, and gently agitate the loop in order to release the bacteria. Immediately replace the cap.
- Flame-sterilize the inoculating loop in order to prevent contamination of the bench surface and as a consideration to others in the lab who may later use the inoculating loops.
- Place the flask into an incubator for growth overnight.
- Remove the flask from incubation the next day. Perform a dilution series in order to enumerate the culture.
- Plate the dilutions from the series onto agarose culture media, and incubate the plates overnight.
- Remove the plates the next day, and observe for any contamination.
5. Bacterial Transfers: From Broth Culture to Sterile Liquid Growth Medium
- A fourth scenario of transferring bacteria is from a broth culture exhibiting growth to a tube/flask containing sterile liquid growth medium.
- Remove the cap from the test tube (or flask) containing the pure bacterial culture, and pass the opening of the container twice through the hottest portion of the flame. To prevent contamination, do not set the cap down onto the benchtop.
- Carefully lower the inoculating loop into the tube/flask, and gently press against the side of the container to cool just prior to insertion into the broth culture.
- Remove one loopful of broth culture, and immediately replace the cap.
- Remove the cap from the test tube (or flask) containing the sterile liquid growth medium, and pass the opening of the container twice through the hottest portion of the flame. To prevent contamination, do not set the cap down onto the benchtop.
- Carefully lower the extracted loopful into the sterile liquid broth medium, and gently agitate the loop in order to release the bacteria. Immediately replace the cap.
- Flame-sterilize the inoculating loop (Figure 6) in order to prevent contamination of the bench surface and as a consideration to others in the lab who may later use the inoculating loops.

Figure 6: Inoculating loop turning red hot while being sterilized with a Bunsen burner. - Place the flask into an incubator for growth overnight.
- Remove the flask from incubation the next day. Perform a dilution series in order to enumerate the culture.
- Plate the dilutions from the series onto agarose culture media, and incubate the plates overnight.
- Remove the plates the next day, and observe for any contamination.
Wyniki
The outcome of the procedure demonstrates proper aseptic technique and poor aseptic technique. Figure 7 illustrates the contamination that can arise from poor aseptic technique when pouring agarose plates (top plate: sterile medium; bottom plates: contaminated media).
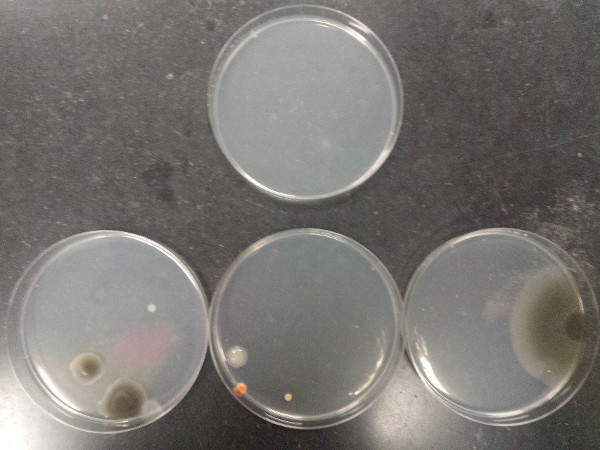
Figure 7: Contamination that can arise from poor aseptic technique when pouring agarose plates. Top plate: sterile medium; bottom plates: contaminated media.
Wniosek i Podsumowanie
Other than using Bunsen burners, aseptic working environments can also be maintained in specialized workstations known as laminar flow hoods, which use directed airflow and filters to maintain sterility.
Proper use of aseptic technique is vital for environmental microbiologists when sampling in the field and in the laboratory when working with media, reagents, and cultured isolates. Poor aseptic technique in the field can result in the transfer of microorganisms from the technician to critical environmental samples, as well as the cross-contamination of microbes from one sample to another. Such events are of importance, for example, in microbial ecology studies seeking to identify and compare bacterial and fungal populations that may be present in a given biome. Contamination of such samples can result in a loss of data integrity. Aseptic technique is also critical for the maintenance of laboratory culture isolates originating from field sampling or from well-established microbial and cell culture repositories. The time, labor, and financial costs that would be required of a lab in an effort to “clean-up” or replace contaminated cultures, particularly rare isolates from unique environments, could be very high and prohibitive, as some isolates may be irreplaceable.
Przejdź do...
Filmy z tej kolekcji:

Now Playing
Aseptic Technique in Environmental Science
Environmental Microbiology
126.3K Wyświetleń

Determination of Moisture Content in Soil
Environmental Microbiology
359.1K Wyświetleń

Gram Staining of Bacteria from Environmental Sources
Environmental Microbiology
100.0K Wyświetleń

Visualizing Soil Microorganisms via the Contact Slide Assay and Microscopy
Environmental Microbiology
42.1K Wyświetleń

Filamentous Fungi
Environmental Microbiology
57.2K Wyświetleń

Community DNA Extraction from Bacterial Colonies
Environmental Microbiology
28.8K Wyświetleń

Detecting Environmental Microorganisms with the Polymerase Chain Reaction and Gel Electrophoresis
Environmental Microbiology
44.5K Wyświetleń

RNA Analysis of Environmental Samples Using RT-PCR
Environmental Microbiology
40.3K Wyświetleń

Quantifying Environmental Microorganisms and Viruses Using qPCR
Environmental Microbiology
47.8K Wyświetleń

Water Quality Analysis via Indicator Organisms
Environmental Microbiology
29.5K Wyświetleń

Isolation of Fecal Bacteria from Water Samples by Filtration
Environmental Microbiology
39.3K Wyświetleń

Detection of Bacteriophages in Environmental Samples
Environmental Microbiology
40.7K Wyświetleń

Culturing and Enumerating Bacteria from Soil Samples
Environmental Microbiology
184.0K Wyświetleń

Bacterial Growth Curve Analysis and its Environmental Applications
Environmental Microbiology
295.7K Wyświetleń

Algae Enumeration via Culturable Methodology
Environmental Microbiology
13.7K Wyświetleń
Copyright © 2025 MyJoVE Corporation. Wszelkie prawa zastrzeżone